Privileged Account and Session Management (PASM) is a standalone product (running on-prem on an Ubuntu server) that allows IT admins to control the servers of your organization. Below you will see how it works and what you can do with it.
1. How does Privileged Account and Session Management (PASM) work?
2. Home
3. Requests
4. Pending Session view
5. Resources
6. Connections
7. Devices
8. Accounts
9. Settings
10. Audit Logs
11. Server Logs
HOW DOES PRIVILEGED ACCOUNT AND SESSION MANAGEMENT (PASM) WORK?
The product facilitates the management of servers and access by delegating permissions to specific users. Users can connect via RDP or SSH to servers according to their permissions for a specific amount of time. In terms of compliance, PASM records all the connections and events that take place when a user gets access to an endpoint.
Privileged Account and Session Management (PASM) must run on an Ubuntu endpoint (physical or virtual machine) set up in the same network as your servers.
Once installed, you can set up an admin account that will manage everything in PASM. To access the PASM interface, you must type your IP address into a browser and log in with the admin credentials. Once logged in, you get access to the portal, and you can set up connections to any of the servers in the organization for any users for a specific interval. The end-users will also get access to the PASM portal to request permissions to connect to a specific server. The requests will be approved by the PASM admin, who will be notified about a new request through an alert that is sent to his email address.
When you press the Connect button on a remote source, a new tab is opened in the browser, and the connection is established. Once you are connected, you can control the remote device just like you would in a regular Remote Desktop connection.
Files can be uploaded to the remote device by using the top drop-down arrow. Once you press the top dropdown arrow, you get a pop-up with a shared drive on Windows or a device tree on Ubuntu that allows you to upload files to.
You can also download files from the remote device by placing the files into the shared drive that gets created on the remote device. On Ubuntu, the remote device gets access to the logged-in user's home folder (and its contents). To see the content of a folder, you have to press the Fetch directory contents icon. Downloading a file can be done by clicking the file's hyperlink.
PRIVILEGED ACCOUNT AND SESSION MANAGEMENT portal
The Privileged Account and Session Management (PASM) portal allows the Admin to manage the connections performed in the organization, and the end-user to request permissions to connect to a specific server/endpoint to perform their tasks/operations. To start using Privileged Account and Session Management (PASM), the Admin needs to configure Connections to the servers/endpoints where end-users will remote in. From the Admin user account, navigate to Resources -> Connections and click Add connection.
A. Admin level
HOME (Favorites)
The Home page presents a list of the users’ preferred resources, which they can either access (e.g., connect or request access to a connection or go to a resource group’s page) or delete from the Favorites list. Users can save up to ten preferred resources by clicking the corresponding star icon on the Connections or Connections Group pages. Should a user’s access to a favored resource expire, or if the resource is removed, it will be automatically deleted from the favorites list.
REQUESTS
In the Requests menu, the PASM admin user can process connection requests. The requests are generated by users who do not have permission to access the resources but have been granted permission to submit access requests. The admin user will see all requests with an option to approve or deny the request:
If an admin chooses to deny a request, they must enter a reason in a pop-up that appears once the ‘Deny’ option is selected.
PENDING SESSIONS VIEW
There's a dedicated section showing active sessions that aren't finished yet. Admin users can find it in the left-hand menu, making real-time session monitoring & management easy.
The 3-dot icon allows you to revoke an ongoing session by pressing the Terminate session button. This will disconnect the user from the remote session.
RESOURCES
The Resources section provides options to add and manage Connections, Connection Groups, and Certificates.
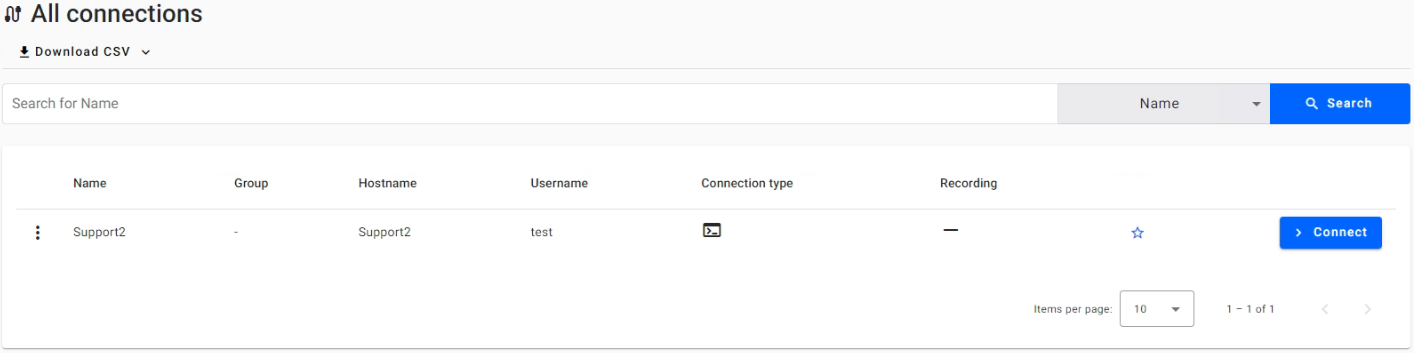
CONNECTIONS
To add new connections, navigate to the Resources menu and select Connections. Click the Add Connection button to open a selector with the two types of connections: RDP or SSH (Linux, Mikrotik routerOS have been tested so far). Selecting any of the options will launch a pop-up window for entering connection details:
- Connection name - a unique name to identify the connection;
-
Hostname - the Fully Qualified Domain Name (e.g., Lab1.lab.ro) or the IP Address of the remote system. The connection uses the DNS servers specified in the Settings -> Active Directory section.
Note: In the hostname section, the domain suffix needs to be added manually - Port (default port is 3389, and 22 for SSH) - the port number for the connection.
- Username - the credentials for the remote system.
- Password - the credentials for the remote system.
- Certificate - if selected, you must choose an available certificate.
- Security type - allows you to choose the level of security (e.g., any or NLA).
- Remote application executable - this functionality is a Windows Server feature called RemoteApp, which allows individual applications to be used over RDP, without providing access to the full desktop environment. If your RDP/Terminal server has this feature enabled and configured, you can configure PASM connections to use those individual applications. Specifies the RemoteApp to start on the remote computer. If supported by your remote desktop server, this application, and only this application, will be visible to the user. RemoteApp requires a special notation for the names of remote applications called an alias. The alias of remote applications must be prefixed with two vertical bars (pipelines) [||]. For example, if you have created a remote application on your server for chrome.exe and have assigned it the alias chrome, you would set this parameter to ||chrome. Note: in order for RemoteApps to work, you need to make sure that Allow users to connect remotely by using Remote Desktop Services is enabled in the Computer Configuration -> Administrative Templates -> Windows Components -> Remote Desktop Services -> Connections.
- Remote application directory - the working directory (if any) needs to be configured according to the way the application is configured in RemoteApp. In the snippet below, the Remote application directory would be C:\Program Files\Google\Chrome\Application\. This parameter has no effect if RemoteApp is not in use.
-
Remote application arguments - the command-line arguments that are allowed (if any) by the remote application. If Do not allow any command-line parameters is enabled on the RemoteApp, the connection will not run any parameters. This parameter has no effect if RemoteApp is not in use.
- Resource Group - allows you to assign the connection to a resource group if necessary.
- Ignore certificate - will connect to the resource and ignore any certificate the resource has assigned at the connection level.
- JIT (Just-in-time) - creates a one-time-use account with a unique password on the spot, which is deleted instantly after use. The option is available only on RDP-type connections and works with LDAPS.
Option to assign permissions to multiple connections - Admins can now select multiple connections and assign permissions all at once, by going to the “Connections” grid, selecting one or multiple connections, clicking the “Actions” menu, choosing the “Assign Permissions” action, and performing changes to user or role permissions in the dedicated modal window.
PASM also supports authentication via Azure.So far, we have tested the creation of connections through
The new connection will be displayed first in the Connections list:
From the Connections list, the Admin can add up to 10 connections to their Favorites list by clicking the star icon (next to the Connect button).
View Sessions
The View Sessions exhibits a list of all active connections associated with particular devices. Adjacently, the Recordings column dutifully indicates the status of session recordings:
To see a recording sample, check out the video at the bottom of this article.
Permissions
In terms of Permissions, the Admin can limit access to the connection based on a user or a role. Permissions are managed on each connection by selecting Permissions from the action menu of a connection. To do so, from the Permissions modal, you can add specific users or roles to the Permissions list. Click inside the search field, enter a minimum of 3 characters, and list the matching users or roles. The list is restricted to the top 5 entries. For each selection, the Admin can select specific permitted actions. The available actions are:
- Use - allows the user to connect to an endpoint without asking for permissions, but does not allow editing or seeing the connection details. The users who get the Use permission will be able to see the Connect button on their Connections page.
- Expiration date - allows the user to use the granted permission for a specific amount of time. Upon expiration, permissions are revoked. The expiration date uses the server time (UTC). The expiration date is available only when the Use tickbox is enabled.
- Request - allows the user to connect to an endpoint only upon request and receiving approval. It does not allow editing or seeing the connection details. The user who gets the Request permission will be able to see the Request button on their Connections page.
- View - allows the user to see the endpoint and its details, but it does not allow him/her to connect or perform any changes;
- Full - allows the user to view or edit the endpoint and its permissions without being able to connect to it. To connect to the endpoint, the Use/Request options are required.
CONNECTION GROUPS
The concept of Connection Groups streamlines the management of access controls by allowing users to categorize multiple connections under a unified group. This organization method is particularly advantageous for environments with many connections, where individual permission assignments can become cumbersome. Once a group is established, the administrator can allocate permissions to this group similarly to how permissions are assigned to individual connections. The advantage here is the granularity and scalability of permissions management. Instead of managing permissions for each connection, the administrator can simply add or modify permissions at the group level.
To populate the group, the Admin user can navigate to the Connection Group’s interface and add new connections to it. The platform’s versatility allows for the addition of both Remote Desktop Protocol (RDP) connections, commonly used for connecting to Windows-based systems, and Secure Shell (SSH) connections, which are typically utilized for secure access to Unix-like operating systems. Adding an RDP connection to the group would enable users with the appropriate permissions to remotely interact with the GUI of the Windows servers or desktops in that group. Similarly, incorporating an SSH connection would allow for command-line-based management of systems, which is essential for configurations, file manipulations, and various operational commands within the group’s view.
Group permissions function in the same way as they do in the Connections section, with these particularities:
- Granting the View permission at the Group level will allow the user to view sensitive information, but not allow them to add a Connection inside the Group.
- Granting the Use or Full permission at the Group level allows a user to add a Connection inside the Group.
- Granting any permission at the Group level will allow all the Connections defined in that Group to inherit those permissions.
CERTIFICATES
The designated section facilitates the administration of digital certificates, which are instrumental in securing connections. After a certificate is successfully stored, users can allocate it to a desired connection as required from the Add/Edit connection modal. Permissions on the Certificates function in the same way as they do in the Connections section, with these particularities:
- Granting the View permission on a Certificate will allow a user to view sensitive information about the Certificate, but will not allow a user to add the Certificate to a Connection.
- Granting the Use or Full permissions on a Certificate allows a user to add the Certificate inside the Connection.
Remote Desktop Services uses certificates to sign the communication between two computers. When a client connects to a server, the identity of the server and the information from the client are validated using certificates. Using certificates for authentication prevents possible man-in-the-middle attacks. When a communication channel is set up between the client and the server, the authority that generates the certificates vouches that the server is authentic. As long as the client trusts the server it is communicating with, the data being sent to and from the server is considered secure.
DEVICES
The Devices section displays the devices available in the network, based on AD Groups. An Admin can then create connections based on devices that are present within the AD Groups directly from this view. This section is only available to Admin users.
ACCOUNTS
Admin users can limit access to the connection based on a user or a role by selecting from the drop-down menu Accounts and then either Users or Roles. This section is only available to Admin users.
USERS
The menu allows the user to add specific users to the Permissions list. The Admin has the option to select between LOCAL or AD users.
For a Local user, you need to specify:
- an email address
- first name
- last name
- password
- force the user to change their password on the first login
- 2-FA
For an AD user, you need to specify:
- common name (CN)
- username
- first name
- last name
The Admin can select the context menu on any user entry to select one of the following actions:
- View Sessions - takes the user to the User Sessions view.
- Edit - opens a pop-up in which the entry can be edited.
- Roles - opens a pop-up in which roles can be either added or removed from the user entry.
- Delete - deletes the user.
ROLES
In this view, the Admin can manage roles that can be assigned to the users. Note that there is a set of predefined roles that cannot be deleted or edited; the only permitted action is to add or remove users from the specific roles. The predefined roles are:
- Creator - can create resources (connections, certificates, etc.);
- Administrator - an account with full rights over the entire PASM Dashboard.
Users can select to add a new role, which will bring up a pop-up where they must enter a Role Name and a Description. Subsequently, the user can add other users to the role and add permissions to Connections, certificates, or groups.
SETTINGS
GENERAL
In the General tab, you can configure miscellaneous settings like seeing, setting, or updating the HEIMDAL license key, seeing and updating the PASM version when a new version is available on the server, configuring and removing the TLS certificate (which allows you to access the PASM portal on HTTPS; when accessing it, make sure you match/tie the IP address of your PASM appliance with the CN in the certificate; they can be tied in the local hosts file), and seeing the Audit logs retention period (can be set between 1 and 365 days).
Health check - an extremely useful tool for administrators, which can be found on the “Settings” page, offering the possibility to assess PASM connectivity.
ACTIVE DIRECTORY
In the Active Directory tab, you can set the Active Directory credentials and the DNS address(es) that will be used by PASM when creating a PASM AD user or when using the JIT (Just-in-time) functionality.
LDAP credentials: the connection between PASM and Active Directory is done through LDAP credentials:
- Domain name - the Active Directory domain (specifying the NETBIOS does not work, and this is why you just need to add it like it is displayed in your Active Directory Users and Computers) (e.g., pasm.qa).
- Server host - the IP address of your Domain Controller.
- Username - the username of the account used by PASM to connect to your Domain Controller (e.g, user@domain or DOMAIN\user, depending on how your AD users are configured).
- Password - the username's password.
- LDAPS - enable/disable PASM connectivity to Active Directory using LDAPS (here is how to configure LDAPS).
- Bypass Log On To - bypasses the Log On To mechanism used on a user created with Just-in-time. It is recommended that you use this functionality in conjunction with the recording feature to be able to monitor security flaws that might occur.
-
JIT (Just-in-time) - this functionality creates a temporary user (in Active Directory) with a unique password (similar to a user rotation) that is allowed to perform an RDP connection to connection resources (requires LDAPS to be enabled). After ending the RDP connection, the JIT user is automatically removed from the Active Directory user list. Before enabling JIT, you need to create 2 new groups in Active Directory and add additional settings to the Default Domain Policy GPO (or to a new GPO) by adding the 2 new groups in the Restricted Groups area in Group Policy Management and allowing logon through Remote Desktop Services.
Prerequisites for JIT
1. Make sure LDAPS is configured and working. If not, you will have to configure it (here is how). You can test if LDAPS is configured and operational on the Domain Controller by running ldp.exe and connecting to the Domain Controller's IP address through port 636 (with SSL enabled). If the connection fails, you need to check if you have a certificate that allows LDAPS.
2. On the Domain Controller, open Server Manager -> Tools -> Active Directory Users and Computers and right-click the Builtin object/folder to add a new group (New -> Group). Starting with version 1.0.0.117, Security Groups can be created in custom Organizational Units (however, the temporary users created by PASM JIT will be created under the default Users container).
3. Name the new group PASM Remote Desktop Users (this group is dedicated to standard/non-elevated users), leave the default settings on the Group scope (Global) and the Group type (Security), and press Ok. Repeat this operation and create the PASM Admin Users (this group is dedicated to elevated users).
4. Add the 2 newly-created groups to the Restricted Groups of the Default Domain Policy (or a new GPO). To do so, access Server Manager -> Tools -> Group Policy Management, right-click Default Domain Policy, and edit it. Navigate to Computer Configuration -> Policies -> Windows Settings -> Security Settings, right-click on Restricted Groups, and press the Add Group button to add a group. Add the PASM Remote Desktop Users group with the Remote Desktop Users membership (in This group is a member of: section) and do the same for the PASM Admin Users group.
If you encounter an error when attempting to connect with a standard user to the Domain Controller, check if Allow log on through Remote Desktop Services includes the Remote Desktop Users group. By default, only the Administrators group is allowed. This can be checked in the Server Manager -> Tools -> Group Policy Management, by editing the relevant GPO (or Default Domain Policy, or any other policy that applies within the domain). Navigate to Computer Configuration -> Policies -> Windows Settings -> Security Settings -> Local Policies -> User Rights Assignment. Open the Allow log on through Remote Desktop Services and add the Remote Desktop Users group if not present.
5. Delegate control for the PASM Remote Desktop Users by accessing Server Manager -> Tools -> Active Directory Users and Computers. Right-click the domain and select Delegate Control. For each group, you need to grant the desired permissions (Create, delete, and manage user accounts, Reset user passwords and force password change at next logon, Read all user information, Modify the membership of a group).
In the case of the PASM Admin Users, you can add the same permissions and additional permissions that might be needed. The user account specified in the Active Directory settings (within the PASM Dashboard) must have permissions that are equal to or higher than those assigned to the elevated user group (PASM Admin Users) or the standard/regular user group (PASM Remote Desktop Users).
Once the AD details have been filled in, you need to press the Test button to test the connectivity and ensure the connection is successful. After successfully testing the connection, press the Save button to save the credentials.
The DNS servers section allows you to specify the DNS IP addresses of the DNS server(s) that will be used to resolve the computer hostnames when defining a connection.
RECORDINGS
The Recordings section allows the Admin user to change the default settings applied for session recording. They can set the retention period (between 1 and 365 days), resolution, and bitrate of the recordings, as well as choose the disk size of the recordings that can be utilized within the Disk Size Retention field (the default is set for 100 GB). Recordings are stored by default in a raw state, and an Admin user can choose whether to process recordings, converting them from raw into .mp4 automatically. When processing a recording, PASM will convert the .raw file into .m4v and then into a .mp4 (with ffmpeg). The conversion interval varies depending on the length of the recording. For example, on a PASM appliance running with 2 cores and 8GB of RAM, an RDP session of 1 hour and 40 minutes can be converted in about 21 minutes (at 1920x1080, 2Mbps quality), while for an 8-9-hour RDP session, the recording can be processed in about 2 hours.
Note that the file size can vary depending on what exactly was displayed during the connection when the recording was performed (for example, if during the connection, a video was displayed, the file size will increase).
AZURE
In the Azure tab, you can create an Entra ID/Azure application to allow your users to log in to the PASM Dashboard using the Azure Login functionality.
As a prerequisite, make sure you create the PASM login application in the App registrations section (within Entra ID/Azure). To create it, follow the steps below:
1. Open the Azure AD/Entra Portal and log in with your Microsoft Administrator user account.
2. Once logged in, in Azure Active Directory (Entra), click on App registration.
3. Click on New registration at the top.
4. Provide the App details and click Register:
a. Name - enter a name for your application,
b. Supporter account types - select Accounts in this organization directory only (Single tenant) or another option that applies to your setup.
c. Redirect URI (optional) - Single-page application (SPA) and the value should be something similar to https://your-PASMs-IP-address-or-domain/auth/azure-login
Here is an example of what it should look like (mind the fact that the data and value below are not real):
5. After registering, you will be redirected to the application's Overview page.
6. Go to Token configuration and press Add optional claim to add a claim.
7. From the right-side menu, select the ID radio button and tick the email, family_name, given_name, and upn tickboxes.
8. When you get the following prompt, enable Turn on the Microsoft Graph email, profile permission (required for claims to appear in token), and press Add.
9. The claims should look like this:
10. Now, you can go back to the Overview section to get the Directory (tenant) ID and the Application (client) ID that you will use in the PASM Dashboard:
11. The next thing is to enter your Entra ID/Azure tenant ID in the Azure tenant ID field and the Azure Application (client) ID you get after creating the PASM login application.
Once added, you first must test the connection (by pressing the Test button. If you get a positive validation response, you can then save the changes. In case you receive a negative validation response, make sure you haven't missed any of the previously specified matters.
Note: If the message "Could not validate Azure Settings" appears when testing the settings, you will need to create an exception for location checking in Conditional Access and apply it to the App registration policy for PASM. Since Heimdal-PASM VM is a Linux box, it doesn’t report its location, and it will fail in Conditional Access.
12. When you test the settings, a Microsoft login popup should appear (if it doesn't, check to see if it's not blocked by the browser). We advise you to enable consent on behalf of your organization. If you have disabled user consent for users in your organization, you must consent on behalf of your organization for the Azure Login functionality to work properly for all users.
SMTP
The SMTP section allows Admin users to configure these settings and enable users to receive emails for the events listed below. Admins can get emails to their own email address or to multiple addresses listed in the SMTP configuration section (Permission requests email addresses field). If these settings are configured, the following emails can/will be sent:
- Reset Password - Users can add their email, and they will receive an email with a link to reset their password.
- Reset 2-Factor Authenticator - upon successful login using their email and password, users with two-factor authentication (2FA) activated will be presented with an option to reset it. Subsequently, a reset link will be dispatched to their registered email to facilitate the reconfiguration of their authenticator.
- Account blocked - If the user fails to log in several times, their account will be blocked for several minutes. They will also receive an email notifying them of this and giving them the option to change their password.
-
New Permission Request - When a new permission request is submitted, the Admin (or specified notification destination emails) will receive an email with the requested resource, the request reason, and a link to see current permission requests.
- Approved Permission Request - When a user’s permission request is approved, they will receive an email to notify them, along with a link to see their resources of the requested type (e.g., if they requested access to a connection, they would receive a link for the Connections page).
- Denied Permission Request - When a user’s permission request is denied, they will receive an email to notify them, along with the reason for the request denial.
Host - Specify the IP address or FQDN of the sending SMTP server
Port - Specify the port of the SMTP host
Email - Specify the email address used as the sender
Password - Specify the email address's password
Permission requests email addresses - Specify the alternate email address(es) to use instead of the PASM admin's email
Ignore SSL - Disables the SSL validation when attempting to connect to the SMTP server (requires a thumbprint)
Thumbprint - the SSL certificate thumbprint
Before saving the credentials, you need to test the SMTP connection to be able to save the configuration.
AUDIT LOGS
All operations that create, update, or delete a resource are logged. The section is available for each user. Admin accounts see the logs for all users. The available logs are by type, affected resource, or by date range. The audit logs cleanup is performed in the job that runs at 1:00 AM UTC every night. For the job to run, keep in mind that the containers must be up and running.
SERVER LOGS
This section is accessible to admin users, and it is dedicated to visualizing the server logs from PASM containers, making the relationship with your/our Technical Support teams more efficient and leading to faster resolution times and increased user satisfaction.
B. End-user level
The end-user can use Privilege Accounts and Session Management (PASM) by logging into the PASM portal and requesting approval to connect to a pre-defined device. From the Requests section, the end-user needs to click the Request button to request access.
HOME (Favorites)
The Home page presents a list of the users’ preferred resources, which they can either access (e.g., connect or request access to a connection or go to a resource group’s page) or delete from the Favorites list. Users can save up to ten preferred resources by clicking the corresponding star icon on the Connections or Connections Group pages. Should a user’s access to a favored resource expire, or if the resource is removed, it will be automatically deleted from the favorites list.
REQUESTS
The requests are generated by users who do not have permission to access the resources but have been granted permission to submit access requests:
The user who submits the access request can select an exact date and time for the duration of the access. On the user side, once an access request is sent, the pending request is displayed in the Requests section with the status pending and an option to cancel. The user will see only their requests. If the request is declined, the user cannot connect to the resource. If the request is approved, the Request button changes to a Connect button, and the user can access the resource (the user will have the Use permission added once the request is approved).
RESOURCES
The Resources section provides options to add and manage Connections, Connection Groups, and Certificates.
CONNECTIONS
On this page, a regular user can connect or request permission to connect to an endpoint
CONNECTION GROUPS
The regular user can get group permissions to remotely interact with the GUI of the Windows servers or desktops in that group. Users are endowed with full connection interaction privileges, mirroring the standalone connection setup functionality.
CERTIFICATES
Regular users can use the defined certificates to connect to specific devices.
AUDIT LOGS
Non-admin users will see only the audit logs of their own user accounts. The available logs are by type, affected resource, or by date range. The audit logs cleanup is performed in the job that runs at 1:00 AM UTC every night. For the job to run, keep in mind that the containers must be up and running.Download CSV - this functionality is prominently featured on all Resource pages and serves a crucial function for users requiring data portability and offline analysis. When engaged, this feature generates a comma-separated values (CSV) file that encapsulates the current data displayed on the page. It is particularly beneficial for administrators who need to create reports, conduct audits, or maintain records for compliance purposes. The downloaded file reflects the exact state of the data at the time of download, including any active filters or search terms applied, thereby ensuring that the offline data is as relevant and specific as needed.
Dark mode - changes the theme from light to dark.